Types
Brands
- Acura
- Afeela
- Alfa Romeo
- Alligator
- Apollo Automobil
- Aprilia
- Arch
- Arctic Cat
- Aston Martin
- Audi
- Bentley
- BMW
- Bollinger
- Boss Hoss
- Buell
- Bugatti
- Buick
- Cadillac
- CanAm
- Caterham
- Chevrolet
- Chrysler
- Citroen
- Cleveland CycleWerks
- Curtiss
- Dacia
- Dodge
- Ducati
- Ferrari
- Fiat
- Fisker
- Ford
- General Motors
- Genesis
- GMC
- Harley Davidson
- Honda
- Husqvarna
- Hyundai
- Indian
- Ineos
- Infiniti
- Jaguar
- Janus
- Jeep
- Karma
- Kawasaki
- Kia
- Koenigsegg
- KTM
- Lamborghini
- Land Rover
- Lexus
- Lightning
- Lincoln
- Lordstown
- Lotus
- Lucid Motors
- Maserati
- Mazda
- McLaren
- Mercedes
- Mercury
- MG
- Mini Cooper
- Mitsubishi
- Moto Guzzi
- MTT
- Nikola
- NIO
- Nissan
- Pagani
- Peugeot
- Piaggio
- Polaris
- Polestar
- Pontiac
- Porsche
- Ram
- Renault
- Rimac
- Rivian
- Rokon
- RollsRoyce
- Royal Enfield
- Saab
- Saturn
- Scion
- SEAT
- Ski-Doo
- Skoda
- Smart
- Spyker
- Subaru
- Suzuki
- Tesla
- Toyota
- Triumph
- Vauxhall
- Vespa
- VinFast
- Volkswagen
- Volvo
- Yamaha
- Z Electric Vehicle
- Zero Motorcycles
Article Categories
- Acura News
- Alfa Romeo News
- Aston Martin News
- Audi News
- Bentley News
- BMW News
- Buick News
- Cadillac News
- Car News
- Chevrolet News
- Chrysler News
- Dodge News
- Fiat News
- Ford News
- GMC News
- Honda News
- Hyundai News
- Infiniti News
- Jaguar News
- Jeep News
- Kia News
- Lexus News
- Lincoln News
- Mazda News
- Mercedes News
- Nissan News
- Porsche News
- Subaru News
- Tesla News
- Tips and Tricks
- Toyota News
- Volkswagen News
- Volvo News
More Articles
How do I change the serpentine belt on my car?
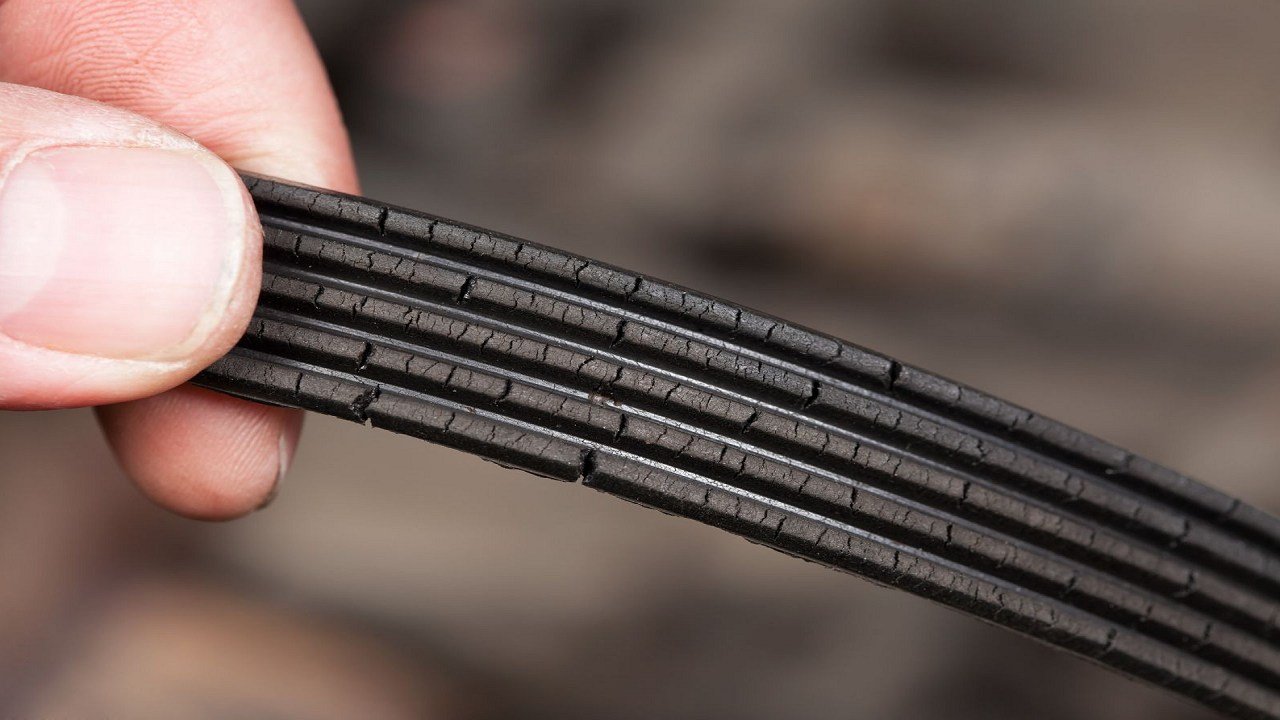
Changing the serpentine belt on your car is a relatively straightforward process, but it's important to follow proper safety precautions and guidelines. Here's a general step-by-step guide to help you replace the serpentine belt:
Tools and Materials You'll Need:
New serpentine belt (make sure it's compatible with your car's make and model).
Wrench or socket set.
Serpentine belt diagram (usually located on the hood or near the radiator).
Belt tensioner tool (optional, but can make the job easier).
Safety goggles.
Steps:
Park Safely: Make sure your car is parked on a level surface and the engine is off. Open the hood and locate the serpentine belt system.
Locate Belt Path and Diagram:
Before removing the old belt, take a photo or draw a diagram of the belt's routing. Most vehicles have a diagram under the hood or near the radiator that shows the correct path of the serpentine belt.
Release Belt Tension:
Locate the belt tensioner. This is a pulley that keeps the belt tight. Use your wrench or belt tensioner tool to rotate the tensioner in the direction that loosens the belt. This will relieve tension on the belt, allowing you to remove it.
Remove Old Belt:
While holding the tensioner in the loosened position, slide the old belt off the pulleys. Pay attention to the routing so you can install the new belt correctly.
Install New Belt:
Refer to the diagram you made earlier or the one located on the car to ensure the new belt is routed correctly around the pulleys. Make sure the belt is properly seated on each pulley.
Release Tensioner and Check Belt:
Release the tensioner slowly, allowing it to put tension on the new belt. Double-check that the new belt is properly seated on all pulleys.
Inspect Pulleys and Belt:
Check the condition of the pulleys while the belt is installed. Look for any signs of wear or damage. Also, inspect the new belt to ensure it's properly aligned and seated.
Start the Engine and Check:
Start your car and let it idle for a few minutes. Watch the belt as it rotates on the pulleys to ensure it's moving smoothly and not slipping.
Final Checks:
Turn off the engine and close the hood. Take a short drive to ensure the belt is functioning correctly and there are no unusual noises or issues.
Please note that this is a general guide, and specific steps may vary based on your car's make and model. If you're not comfortable performing this task yourself, it's recommended to seek the assistance of a professional mechanic. Replacing the serpentine belt is important for the proper functioning of your vehicle's accessories, so if you're unsure or encounter difficulties, it's best to consult a professional.
Tesla Looks to Expand Robotaxi Geofence Once Again

Tesla Semi Has Shipped Over 20K Battery Packs

Tesla Bumps Model 3 Prices in Europe

Tesla Stock Gets Bullish Outlook from Morgan Stanley
I Took a Tesla Cybertruck Demo Drive

Fisker unveils Pear electric car with sub $30K price

Tesla Launches 1000 Volt Powertrain

Amazon Announces Major Milestone in EV Transition With Rivian

Tesla Model Y Was Australia’s Second Best-Selling Car in June

Best Tesla Cybertruck Accessories For Your Upcoming Pickup